Learn how to make Perfect Turkey Gravy with rich flavor, smooth texture, and foolproof results every time!

Nothing makes a holiday plate feel complete quite like Perfect Turkey Gravy—silky, rich, deeply savory, and poured generously over everything in sight!
Ingredients For Perfect Turkey Gravy

This yields about 3–4 cups of gravy, enough for a small crowd or for two people who treat gravy like a beverage.
For The Pan And Drippings
- Pan drippings from your roasted turkey
- Hot water or unsalted turkey/chicken stock – 2–3 cups, depending on how much gravy you want
- Dry white wine – ¼ cup (optional, for extra depth)
For The Roux (Thickener)
- Unsalted butter – 4 tbsp
- All-purpose flour – 4 tbsp
For Seasoning And Finish
- Fine sea salt – start with ½ tsp, adjust at the end
- Black pepper – ½ tsp, freshly ground
- Fresh thyme leaves – 1 tsp, chopped (or ½ tsp dried)
- Fresh rosemary – ½ tsp, finely chopped
- Soy sauce or Worcestershire sauce – 1–2 tsp (umami booster, no weird “soy” flavor when used in this amount)
Gravy Success Starts In The Roasting Pan
Collect Every Drop Of Flavor
- As soon as the turkey comes out of the oven and moves to its resting spot:
- Hold the roasting pan at a slight angle so the drippings gather in one corner.
- Spoon or pour all the drippings into a heatproof measuring jug or fat separator.
- Scrape out any browned bits stuck to the bottom of the pan and drop them into the jug or leave them in the roasting pan if you prefer to deglaze directly in it. Those browned bits carry pure flavor.
- If the drippings look intense and salty, celebrate. You’re about to stretch them with stock.
Separate Fat From Liquid Like A Pro
Skim Or Separate The Fat
- You want some fat for richness, not an oil slick.
- Let the jug sit for 5–10 minutes.
- The fat rises to the top and the darker liquid drippings settle underneath.
- Use a spoon to skim off the top layer of fat into a small bowl.
- Measure out 4 tbsp of this fat. If you don’t reach 4 tbsp, top up with unsalted butter until you hit that amount.
Now you have:
- About 4 tbsp turkey fat/butter mixture for the roux.
- Rich drippings to mix with stock for your gravy base.
Build The Liquid Base Before The Roux
Deglaze The Roasting Pan
- You’re pulling all that browned goodness into your gravy, not leaving it welded to the pan.
- Set the roasting pan across one or two burners over medium heat.
- Pour in the white wine (if using) and about ½ cup of stock.
- As it starts to simmer, scrape the bottom of the pan with a wooden spoon until every browned bit loosens into the liquid.
- Once the bottom looks clean and the liquid smells rich and savory, pour this into the jug with your drippings.
Making Your Total Liquid
- Add enough stock to the drippings and deglazing liquid to reach 3 cups total.
- Taste a spoonful. The liquid should taste like strong turkey broth with a faint saltiness.
- If it tastes very salty, keep that in mind and hold back a little on salt until the end.
- This mixture becomes the “water” for your roux. Now the fun part.
How To Make A Smooth, Lump-Free Roux
Cook The Fat And Flour Together
You’re about to create the silky base that answers all lumpy-gravy trauma.
- In a medium saucepan, melt the 4 tbsp reserved fat/butter mixture over medium heat.
- When the fat looks hot and glossy, sprinkle in 4 tbsp flour.
- Start whisking right away.
- Whisk continuously for 2–3 minutes.
- The mixture starts pale and pasty, then turns smoother and slightly golden.
- You want a light to medium tan color and a nutty smell.
- Do not rush this step. Proper cooking here removes any raw flour taste later.
- You now have a roux that behaves nicely instead of turning your gravy chalky.
Transform Stock And Roux Into Actual Gravy
Add The Liquid Slowly (This Is Where Most People Rush)
- Once the roux looks smooth and lightly golden, keep the heat on medium.
- Start with a ½ cup of your drippings-and-stock mixture.
- Whisk vigorously. The mixture thickens into a paste almost immediately.
- Add another ½ cup of liquid and whisk again until smooth.
- Repeat in ½–¾ cup increments, whisking thoroughly after each addition, until all 3 cups of liquid are in the pot.
- The mixture thins out gradually and starts to look like glossy gravy instead of wallpaper paste.
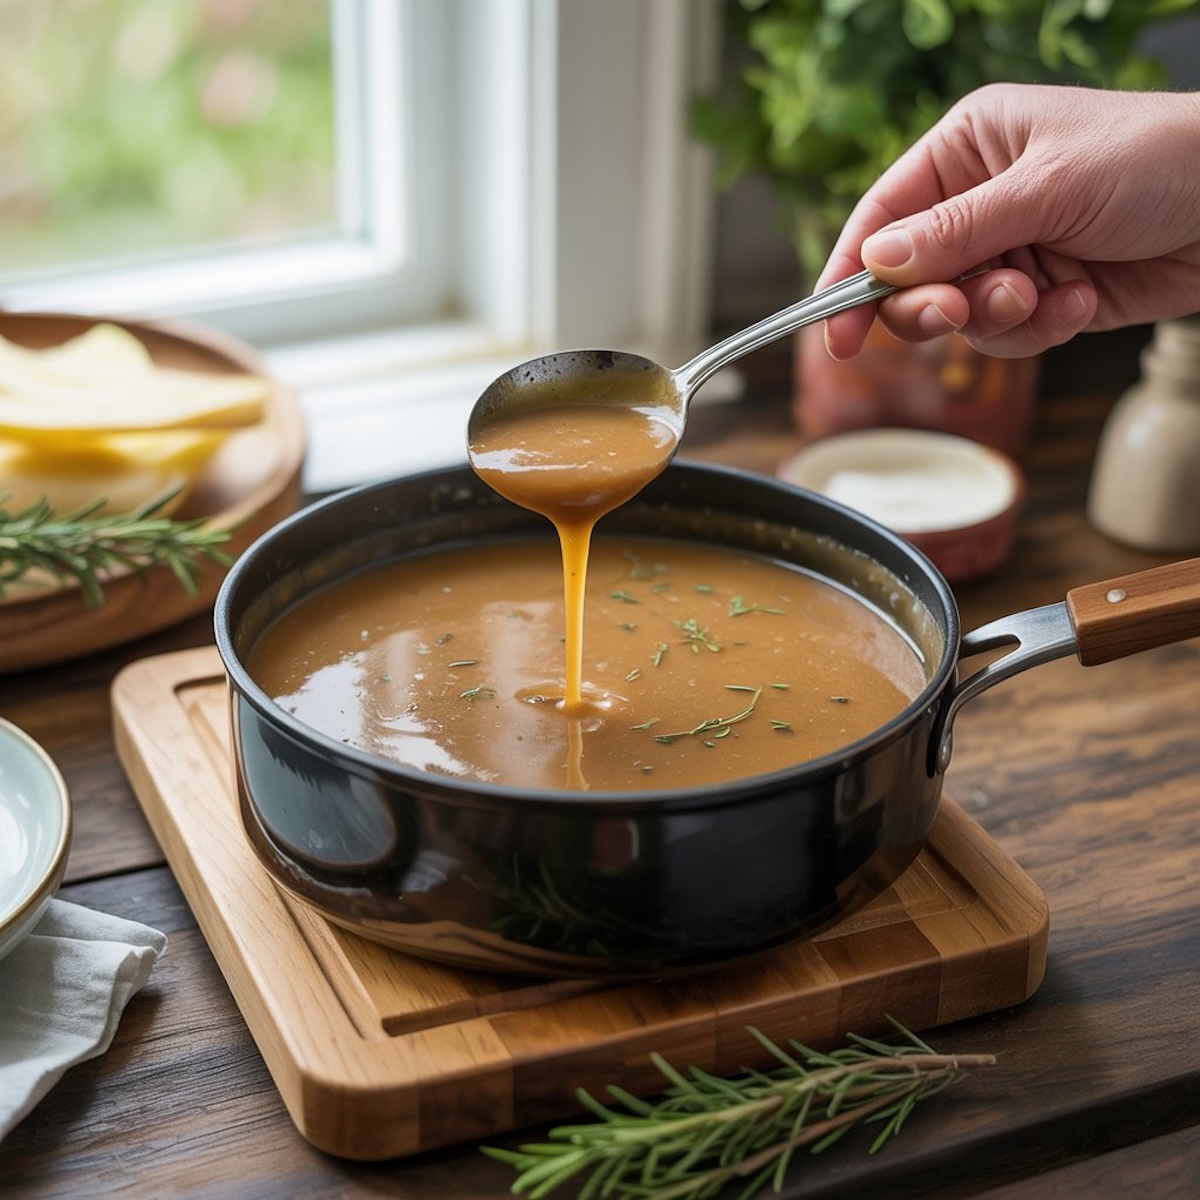
Simmer Until The Texture Is Perfect
- Bring the gravy to a lazy simmer over medium heat, whisking often.
- Once it starts bubbling gently, lower heat to medium-low.
- Let it simmer for 6–8 minutes, whisking every 30–60 seconds.
- The gravy thickens slightly and the flavor deepens as the flour finishes cooking.
- If it ever looks too thick, whisk in a bit more stock, 2–3 tbsp at a time, until the consistency feels right for you.
You’re aiming for gravy that coats the back of a spoon and leaves a clear line when you drag your finger through it.
Seasoning: Where Good Gravy Turns Legendary
Add Herbs And Umami Boost
- Stir in thyme, rosemary, and 1 tsp soy sauce or Worcestershire.
- Let the gravy simmer another 2 minutes.
- Taste a spoonful.
- If it needs depth, stir in the remaining 1 tsp soy or Worcestershire.
- If it needs salt, sprinkle in a pinch and stir again.
- Add more black pepper if you love a peppery finish.
Fix Lumps (If They Sneak In)
- Even experienced cooks meet lumps sometimes. They don’t get the last word.
- If small lumps show up, whisk harder over low heat for 1–2 minutes.
- If stubborn lumps stay, pour the gravy through a fine-mesh strainer into a clean pot or bowl, pressing with a spoon to push the smooth gravy through.
- What comes out looks like you meant perfection from the start.
Keeping Gravy Hot Without Ruining It

Hold It Warm Until Serving
- Once the gravy tastes perfect, keep it over very low heat.
- Whisk every few minutes to stop a skin from forming.
- If the stove feels too strong, tuck the pot over a simmering water bath (double boiler style) and whisk occasionally.
- If the gravy thickens slightly as it sits, whisk in a splash of hot stock right before it hits the gravy boat.
When you treat gravy as its own recipe instead of a last-minute scramble, the whole plate upgrades. The turkey tastes juicier, the stuffing feels more luxurious, and those mashed potatoes almost hum when the gravy hits them.
Bookmark this method, tweak the seasonings to match your holiday menu, and watch how Making The Perfect Turkey Gravy quietly becomes the thing everyone talks about on the drive home!
Do not miss these Christmas Eve Dinner Ideas for Two!