Snow ice cream is a simple, nostalgic winter dessert made with fresh snow and basic ingredients!

There’s something quietly magical about snow ice cream—a simple, nostalgic treat that turns a fresh snowfall into dessert.
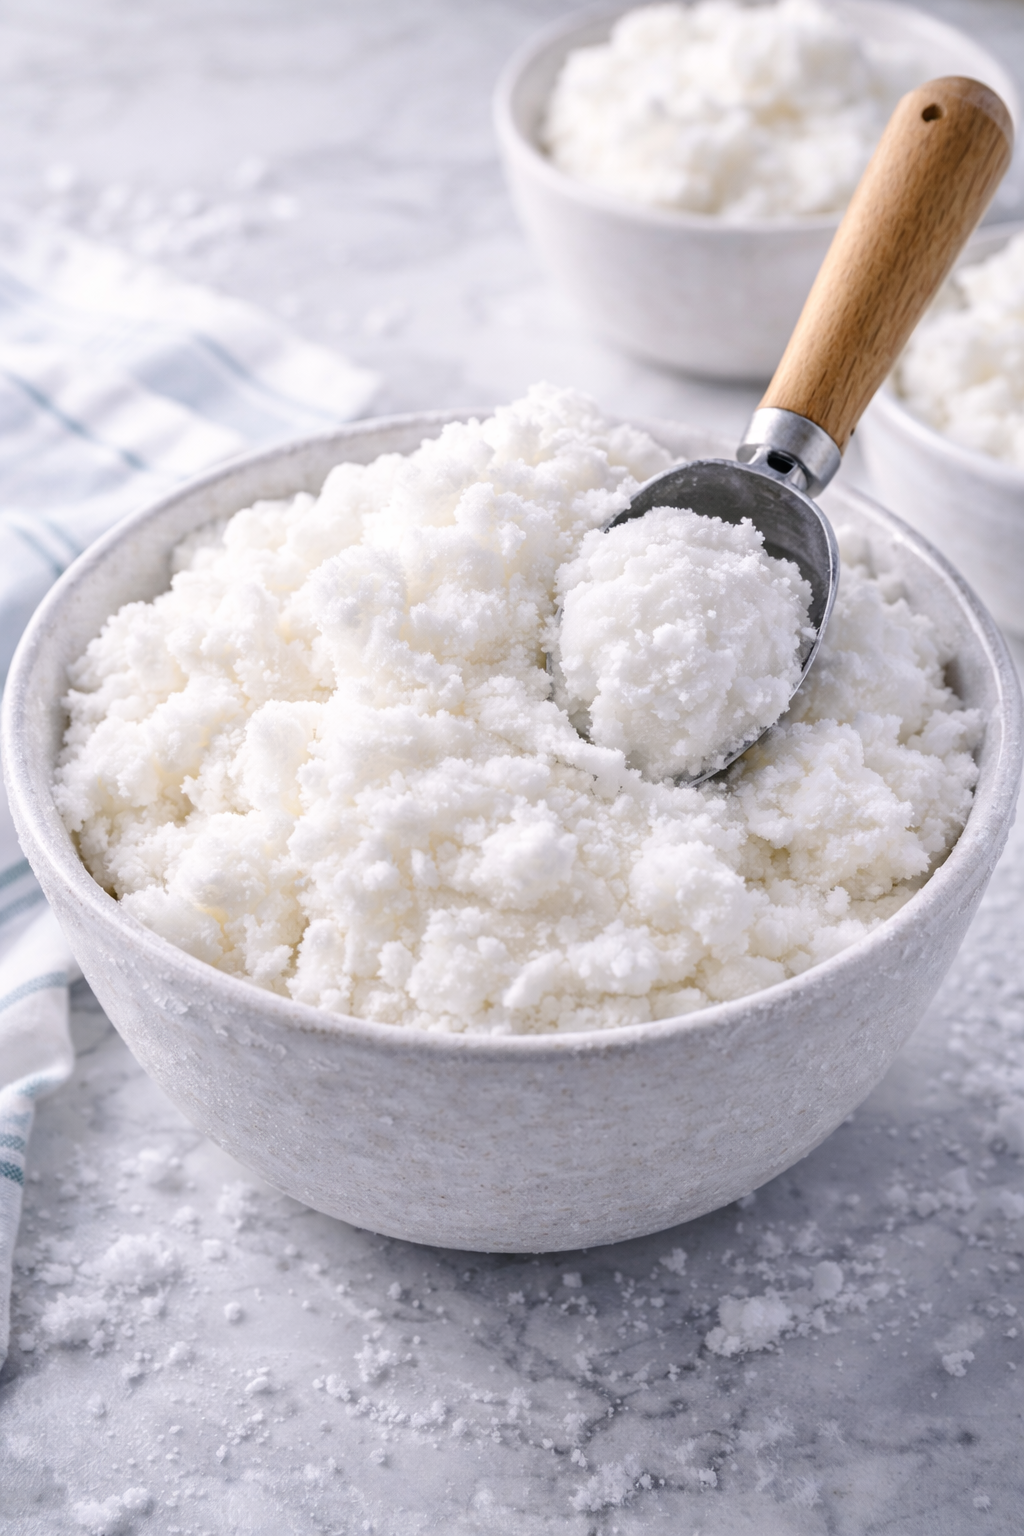
What Snow Ice Cream Should Taste Like (So You Know You Nailed It)
When you do it right, snow ice cream is:
- Fluffy and creamy, not watery.
- Cold and clean, not gritty.
- Scoopable for a few minutes, not instantly turning into soup.
- Sweet but balanced, like soft-serve’s winter cousin.
If yours tastes like sweet snow-water, it’s not because snow ice cream is “meh.” It’s because the method was sloppy. We’re not doing sloppy.
Snow Safety: The Non-Negotiables
I’m keeping this simple and practical, because I want you happy, not Googling “is snow safe to eat” at midnight.
- Use Fresh, Clean Snow: Wait until it has been snowing for at least 20–30 minutes, then collect.
- Skip the very first snow that falls if you live in a place with heavy air pollution.
- Collect from a clean surface: a wide bowl, a clean baking sheet, or a clean cooler lid set outside.
Avoid These Like They’re Exes With Bad Intentions
- Snow near roads, driveways, parking lots, or sidewalks (salt, exhaust, grit).
- Snow under roof edges (drips pick up roof residue).
- Snow from places where pets roam (you already know why).
- Snow that looks gray, crunchy, or suspiciously “seasoned.”
The “Top Layer Only” Rule
Even in a clean area, I scoop the fluffiest top layer only. The bottom layer is where debris likes to hide like a little villain.
Ingredients For The Snow Ice Cream (The Best Base For Perfect Texture)

This makes about 4 servings (or 2 servings if you’re honest!!!).
Snow
- 8 to 10 cups fresh clean snow, loosely packed. You’ll adjust depending on the snow’s dryness, because snow has moods.
The Creamy Base
- Sweetened condensed milk – 1 can (14 oz)
- Whole milk or half-and-half – ½ cup
- Whole milk keeps it creamy without turning heavy. Half-and-half makes it extra rich.
- Pure vanilla extract – 2 tsp
- Fine salt – 1 pinch (¼ tsp)
- Salt is the reason it tastes like ice cream, not sweet milk.
Optional Flavor Boosts (Pick One “Personality”)
- Cinnamon – ½ tsp
- Almond extract – ¼ tsp (with vanilla, it’s bakery magic)
- Cocoa powder – 2 tbsp (whisk into base for chocolate snow cream)
- Peppermint extract – ⅛ tsp (tiny amount; it’s strong)
Toppings That Make It Ridiculous
- Mini chocolate chips
- Crushed Oreos
- Sprinkles
- Toasted nuts
- Caramel sauce
- Strawberry jam swirl
- Crushed peppermint candy
Equipment You’ll Want
- Large mixing bowl (bigger than you think)
- Whisk
- Rubber spatula or wooden spoon
- Measuring cups
- Large spoon for scooping
- A sheet pan or bowl for collecting snow
- Freezer space (for the bowl and base)
Pro-level move: Chill your mixing bowl in the freezer for 30 minutes before you start. It keeps the snow from melting while you mix.
The Fluffy Blizzard Method
Step 1: Chill The Base Before You Touch The Snow
This step separates “wow” from “why is this soup.”
In a bowl, whisk together:
- Sweetened condensed milk
- Whole milk (or half-and-half)
- Vanilla
- Pinch of salt
- Cover and put it in the fridge for 30 minutes (or freezer for 10–15 minutes).
- You want it very cold, not frozen solid.
Why it matters: warm base melts snow instantly and your dessert turns into sweet slush. Cold base keeps the snow fluffy.
Step 2: Collect The Snow The Right Way
- Place a clean baking sheet or large bowl outside.
- Scoop the fluffiest top layer only.
- Bring it inside immediately.
- If the snow starts melting, don’t “push through.” Put it back outside for a minute or grab fresh. Snow ice cream rewards decisiveness.
Step 3: Start With 8 Cups Of Snow
- Put 8 cups of snow in your chilled mixing bowl.
- Make a little well in the center like you’re building a snow volcano.
Step 4: Pour The Base Slowly And Mix Gently
This is where most people mess up by stirring like they’re angry at the snow.
- Drizzle about ⅓ of the base over the snow.
- Fold gently with a spatula: scoop from the bottom, lift, and turn.
- Add another ⅓ of base. Fold again.
- Add the remaining base gradually until you reach the texture you want.
What you’re looking for:
- It should look like soft-serve meets whipped snow.
- It should hold shape when you scoop it.
- It should not look like a puddle.
Step 5: Adjust Like A Cook Who Knows What They’re Doing
Snow varies. So you adjust.
- If it’s too thick and dry: add 1–2 tbsp milk and fold.
- If it’s too thin or melty: add 1–2 cups more snow and fold.
- If it tastes flat: add a tiny pinch more salt and fold again.
- Salt is your secret weapon here. One pinch changes everything.
How To Keep It From Melting Too Fast
Snow ice cream is best eaten immediately, but you can buy yourself time.
- Chill The Serving Bowls: Pop serving bowls in the freezer for 10 minutes. Warm bowls melt snow ice cream like betrayal.
- Freeze For 15 Minutes For A “Scoopable” Finish: If you want a slightly firmer texture: Spread the snow ice cream in a metal pan. Freeze 10–15 minutes. Scoop and serve. Do not freeze for hours expecting it to stay fluffy. Snow ice cream is a moment, not a long-term storage plan.
Flavor Variations That Taste Like You Planned This!!

1) Chocolate Snow Ice Cream
- Whisk 2 tbsp cocoa powder into the base before chilling.
- Add chocolate chips at the end.
2) Peppermint Vanilla “Snowstorm”
- Add ⅛ tsp peppermint extract to the base.
- Top with crushed peppermint candy.
3) Cinnamon Toast Snow Cream
- Add ½ tsp cinnamon to the base.
- Top with crushed graham crackers and a drizzle of caramel.
4) Strawberry Shortcake Snow Ice Cream
- Keep the base vanilla.
- Swirl in 2 tbsp strawberry jam gently at the end.
- Top with crushed shortbread cookies.
Snow ice cream is the kind of dessert that makes winter feel like it’s doing you a favor for once. If you follow this method, you’ll nail the texture, the flavor, and the little “wow” factor that makes everyone hover around the bowl for seconds. Keep this guide close, and you’ll always know you’re making the best snow ice cream the moment the snow starts falling.